Network Monitoring and Management (NMM)
This course teaches the principles of Network Monitoring and Management, illustrated by a variety of open-source tools which students themselves configure and use.
The NMM lab is a trimmed version of the CNDO topology.
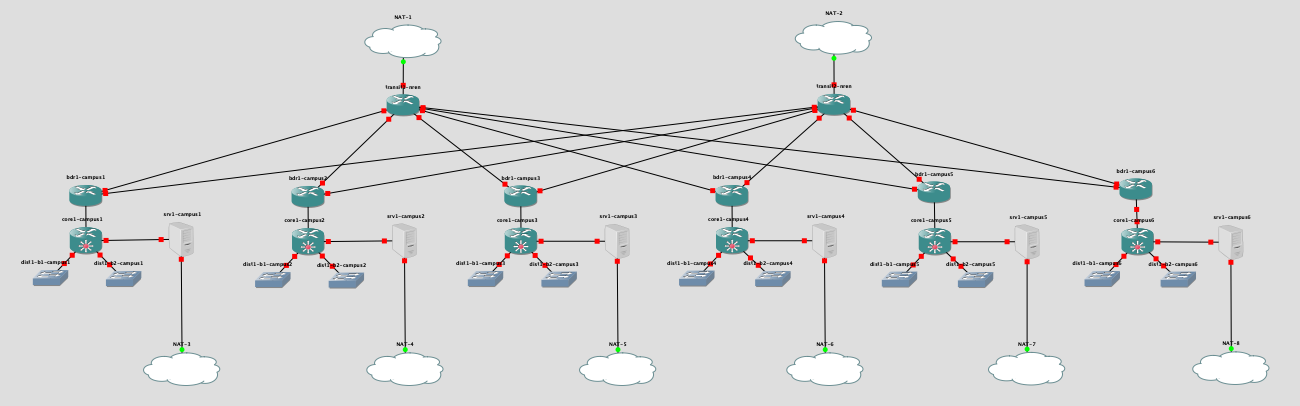
The building edge switches are removed, and instead each srv1 host has 2.5GB RAM, sufficient to run multiple NMM tools. The total memory usage is again 27GB.
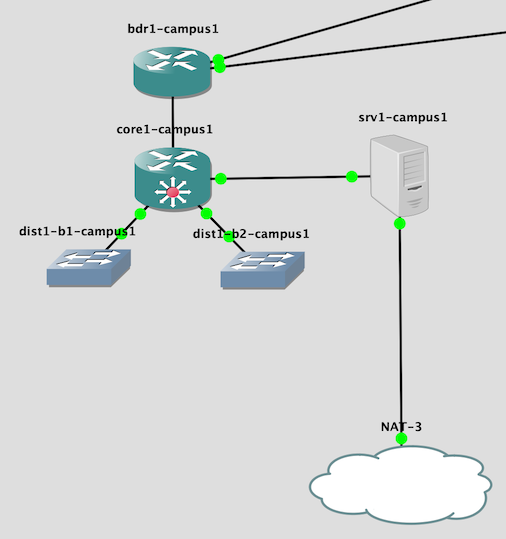
The core and distribution switches are configured with 4 interfaces, as opposed to 16 in CNDO. This reduces the amount of work for LibreNMS to do.
Files
You will need the following files:
| File | Description |
|---|---|
hosts-cndo-nmm |
/etc/hosts file to go on the server |
nmm-<version>.gns3project |
the GNS3 project |
vios-adventerprisek9-m.vmdk.SPA.157-3.M3 |
IOSv image - same as CNDO |
vios_l2-adventerprisek9-m.SSA.high_iron_20180619.qcow2 |
IOSvL2 image - same as CNDO |
nsrc-nmm-<version>.qcow2 |
the VM image with NMM tools pre-installed - same as NOC |
nmm-srv1-campus<N>-hdb-<version>.img (x 6) |
cloud-init configs for srv1 in each campus |
lxd containers
Each srv1 virtual machine starts 6 lxd containers inside it, called host1-host6. From the students' point of view, they see 7 virtual machines in their campus: srv1 and host1-6.
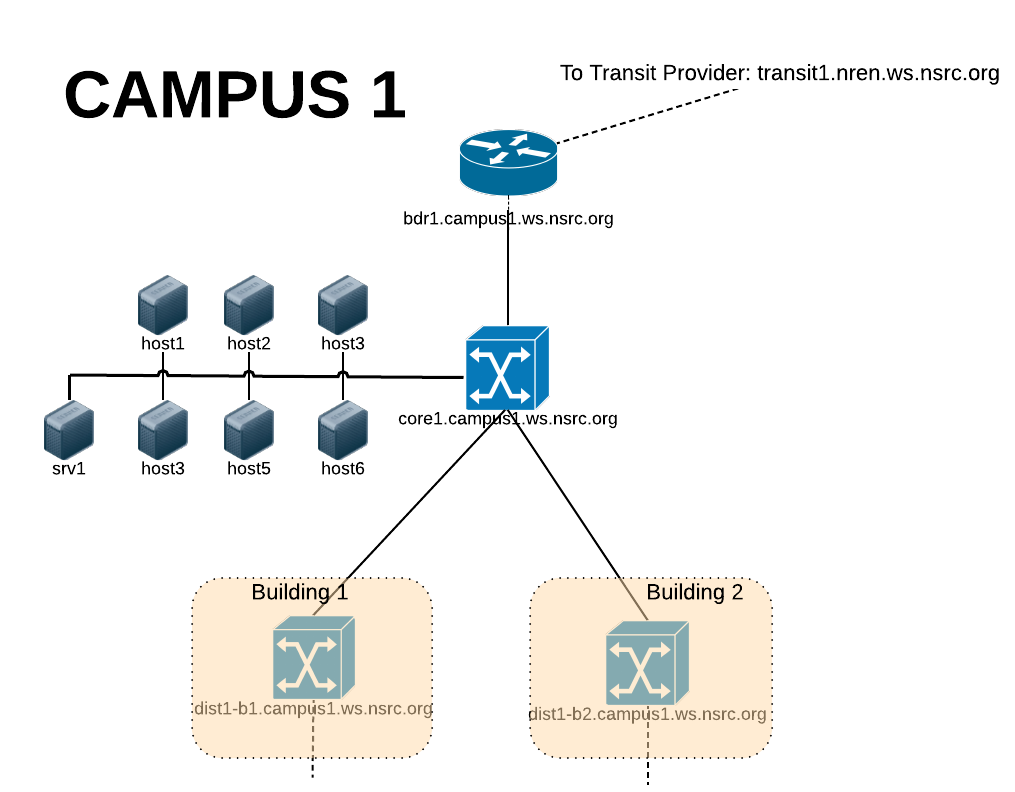
But inside GNS3, there is only srv1. Stopping this will also stop host1-6.
Each of the "host" containers has a set of the smaller NMM tools preinstalled:
- nagios
- snmp / snmpd
- smokeping
- rsyslog
- swatch
- (node_exporter and promtail)
This means that for exercises using these tools, you have 36 instances to play with, and each student can work on their own instance.
The top-level VM (srv1) contains the larger and more resource-intensive tools:
- LibreNMS
- cacti
- nfsen
- RT
- rancid
- mysql (used by LibreNMS, cacti and RT)
- grafana
- prometheus and related tools
- loki
This means that for exercises using these tools, students will have to work in their campus groups.
Backbone addressing plan
All the containers have out-of-band interfaces, so that students' ssh and web traffic does not need to traverse the emulated network.
| IP Address | DNS Name |
|---|---|
| 100.64.0.2 | transit1-nren.ws.nsrc.org |
| 100.64.0.3 | transit2-nren.ws.nsrc.org |
| 100.64.0.10 | srv1.campus1.ws.nsrc.org |
| 100.64.0.11 | host1.campus1.ws.nsrc.org |
| 100.64.0.12 | host2.campus1.ws.nsrc.org |
| 100.64.0.13 | host3.campus1.ws.nsrc.org |
| 100.64.0.14 | host4.campus1.ws.nsrc.org |
| 100.64.0.15 | host5.campus1.ws.nsrc.org |
| 100.64.0.16 | host6.campus1.ws.nsrc.org |
| 100.64.0.2x | (ditto for campus2) |
| 100.64.0.3x | (ditto for campus3) |
| 100.64.0.4x | (ditto for campus4) |
| 100.64.0.5x | (ditto for campus5) |
| 100.64.0.6x | (ditto for campus6) |
| 100.64.0.254 | transit-nren.ws.nsrc.org (on transit1-nren) |
See the training materials for the addressing plan used inside the network.
Credentials
The student routers have username nmmlab, password lab-PW, enable
lab-EN.
The transit routers have username nsrc, password lab-PW, enable
lab-EN.
srv1 and host1-6 ssh login is sysadm with password nsrc+ws.
Monitoring tool credentials are as per the NOC topology - it's the same VM image.
URLs are:
- http://srv1.campusX.ws.nsrc.org/ - full set of tools
- http://hostY.campusX.ws.nsrc.org/ - basic tools only (nagios)
Snapshots
There is a smaller set of snapshots provided.
defaultis the initial state. All routing is configured and the devices have usernames/passwords set, but ssh is not enabled.sshis a snapshot where ssh has been enabled and telnet disabled. Note however that you will need to login to each device and docrypto key generate rsa modulus 2048, as this key is not stored within the config.ssh-snmpis similar, but snmp has also been configured.- There is no snapshot with netflow configured (yet)
Beware that resetting to any of these snapshots will also reset all srv1 and host1-6 to their default states - any work that students have done will be erased! Therefore you almost certainly only want to do this once, before the course starts.
Use the gns3man tool if you want to restore the configuration of an
individual device.